Creating your first Discord bot using Discord.js v13 and hosting for free on repl.it
August 30, 2021This will guide you through setting up a simple Discord bot using JavaScript and where to host it for free. This bot will just do simple stuff like replying to a certain command.
- Prerequisites
- Creating our bot
- Writing our code
- Adding the bot to a server
- Hosting the bot
- Making the bot live forever
Prerequisites
- yarn - I just prefer yarn. Install by
npm i -g yarn - node - v16+ since discord.js v13 requries node v14+
Creating our bot
Let’s head over to Discord developers site ↗️ and create a “New Application”.

Take note of the following since we’ll be using them later.
CLIENT ID

TOKEN
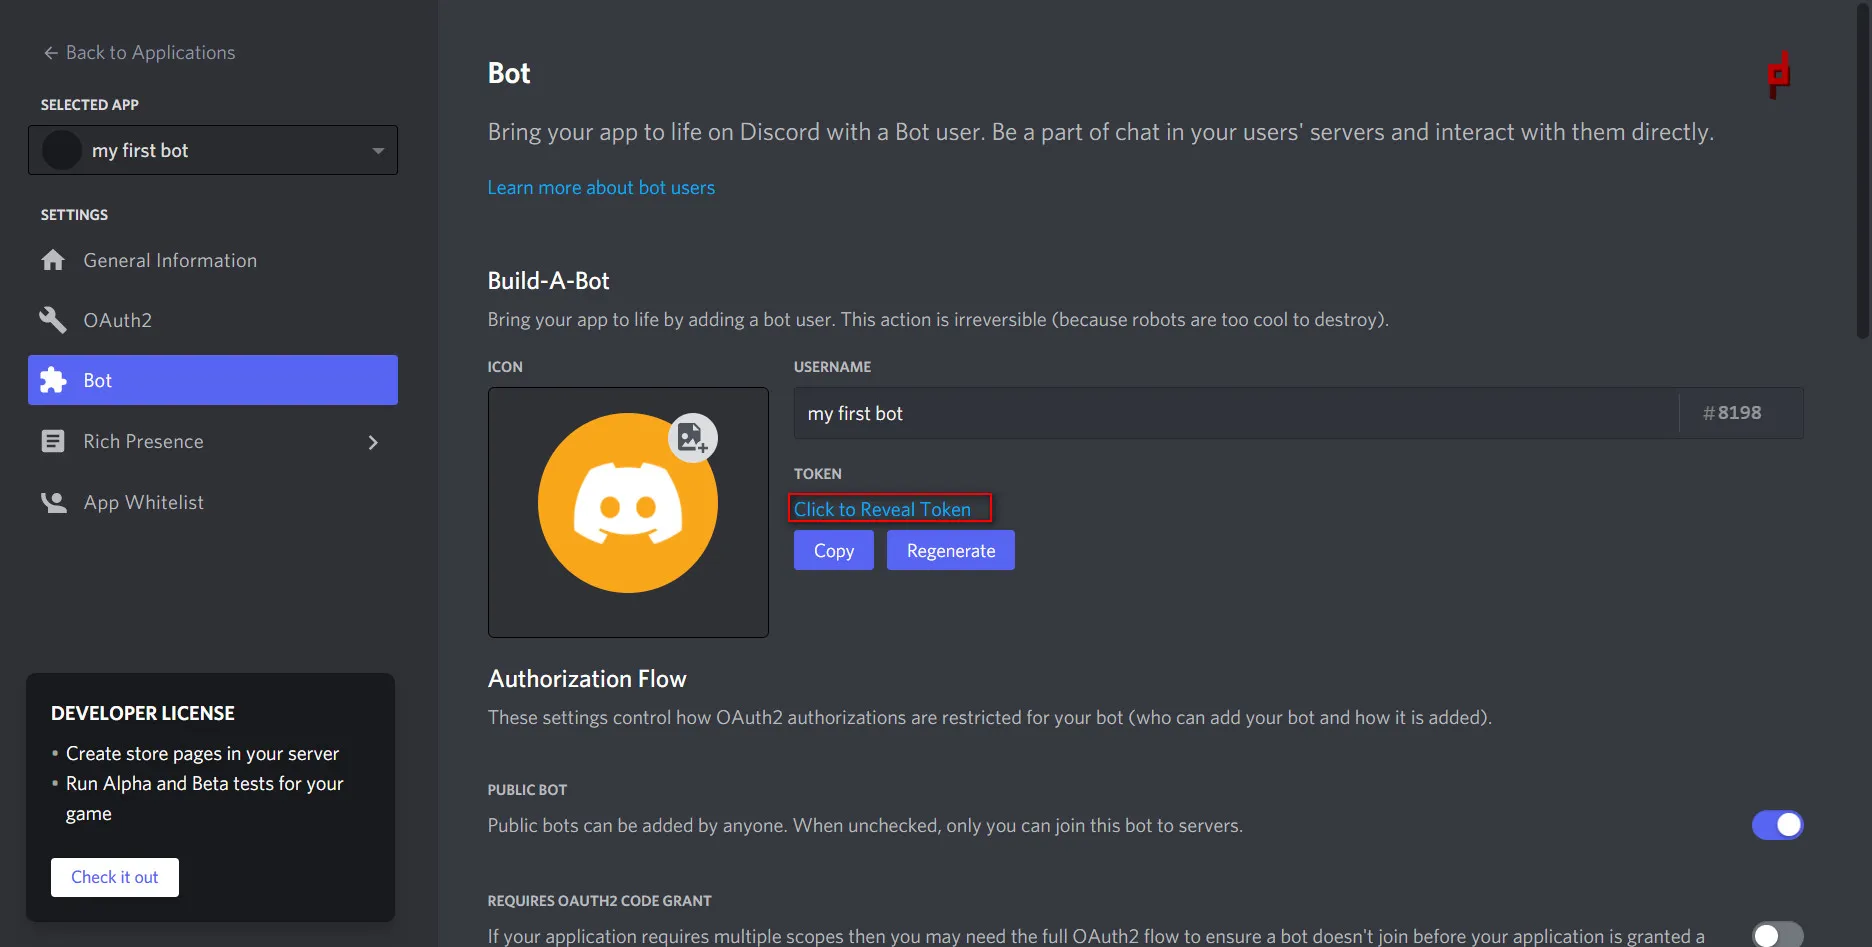
If you can’t see the screen above, just click on “Add Bot”.
Writing our code
Let’s create a folder and init an npm project.
mkdir first-discord-bot # creates the foldercd first-discord-bot # navigates to the foldernpm init -y # generates package.jsonInstall packages
yarn add discord.js@13.1.0 express@4.17.1 node@16.6.1I’ll be using fixed versions to make sure you will have almost the same experience as me during the time of this writing.
The actual code
Create a new file index.js
const { Client, Intents } = require('discord.js')
// server stuffconst express = require('express')const app = express()const port = 3001 // we can change this to any port
app.get('/', (req, res) => {  console.log(Date.now() + ' Ping Received')  res.send('Hello World!')})
app.listen(port, () =>  console.log(`Our bot is running at http://localhost:${port}`),)
// some initsconst prefix = '!bot'const client = new Client({  intents: [Intents.FLAGS.GUILDS, Intents.FLAGS.GUILD_MESSAGES],})
// Actual BOT Codeclient.on('ready', () => {  console.log('Bot is ready') // indicates that bot is ready to receive commands})
client.on('messageCreate', (message) => {  // listens on every message created on the server  const { content } = message
  if (content.startsWith(prefix)) {    // checks if message starts with prefix    const commandParts = content.split(' ') // ["!bot", "ping"]    const target = commandParts[1] // "ping"
    switch (target) {      case 'ping':        message.reply('pong')        break    }  }})
const DISCORD_TOKEN = '' // paste the token hereclient.login(DISCORD_TOKEN)
Explanation of some sections of the code:
- Server stuff - This is when we’ll actually host the bot on a server.
- Prefix - So we can differentiate between
pingand!bot pingand bot will know which messages to reply. - Intents - Are events that the bot will subscribe to. List of all intents is listed here ↗️
- DISCORD_TOKEN - This is the token from the bot we created on the Discord application site.
DISCORD_TOKENis private so don’t push it to a public repository.
Command to start the bot
Go to package.json and add the following.
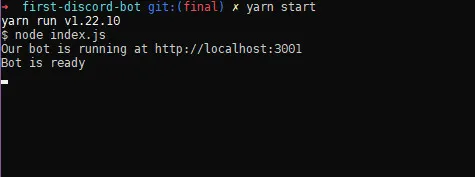
{ "name": "first-discord-bot", "version": "1.0.0", "description": "", "main": "index.js", "scripts": { "test": "echo \"Error: no test specified\" && exit 1", "start": "node index.js" }, "keywords": [] // ...}When we do yarn start we should see the following.
Adding the bot to a server
Copy the CLIENT ID mentioned earlier. Replace the “CLIENT_ID” in the url below and paste it in your browser.
https://discordapp.com/api/oauth2/authorize?scope=bot&client_id=CLIENT_IDThis will ask which server to add the bot.
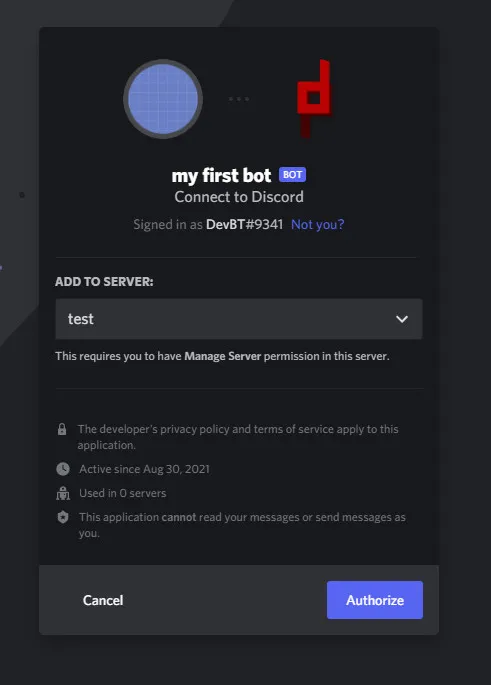
Once you’ve added your bot, run yarn start and try sending !bot ping.

Terminate the bot by doing ctrl+c since we’ll be hosting it on the next part.
Hosting the bot
The bot is finally ready and we just need to host it on a server since we need to run it 24/7. Unless you’ll host the bot in your own pc 😅.
We’ll be using repl.it ↗️ to host our bot server.
You can create a new repl or import from github. We’ll be creating a new repl right now since the import is very straight forward.
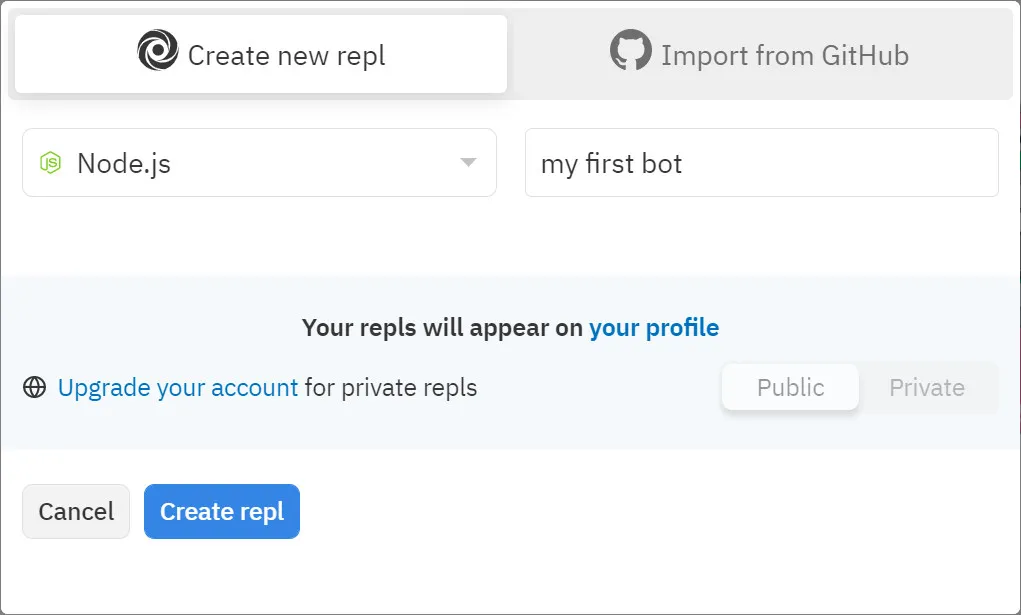
You may notice that the node version installed is v12 but we need v14+. Don’t worry since we’ll be using the node we installed with our project.
Copy and paste the code to repl. We already have index.js so we only need to create a package.json.
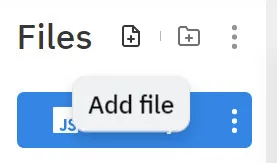
Another file we will create is .replit.
language = "nodejs"run = "node_modules/.bin/node index.js"This tells repl to use the node version installed in our project instead of the node version of repl which is only v12.
Once that’s done just click on Start.
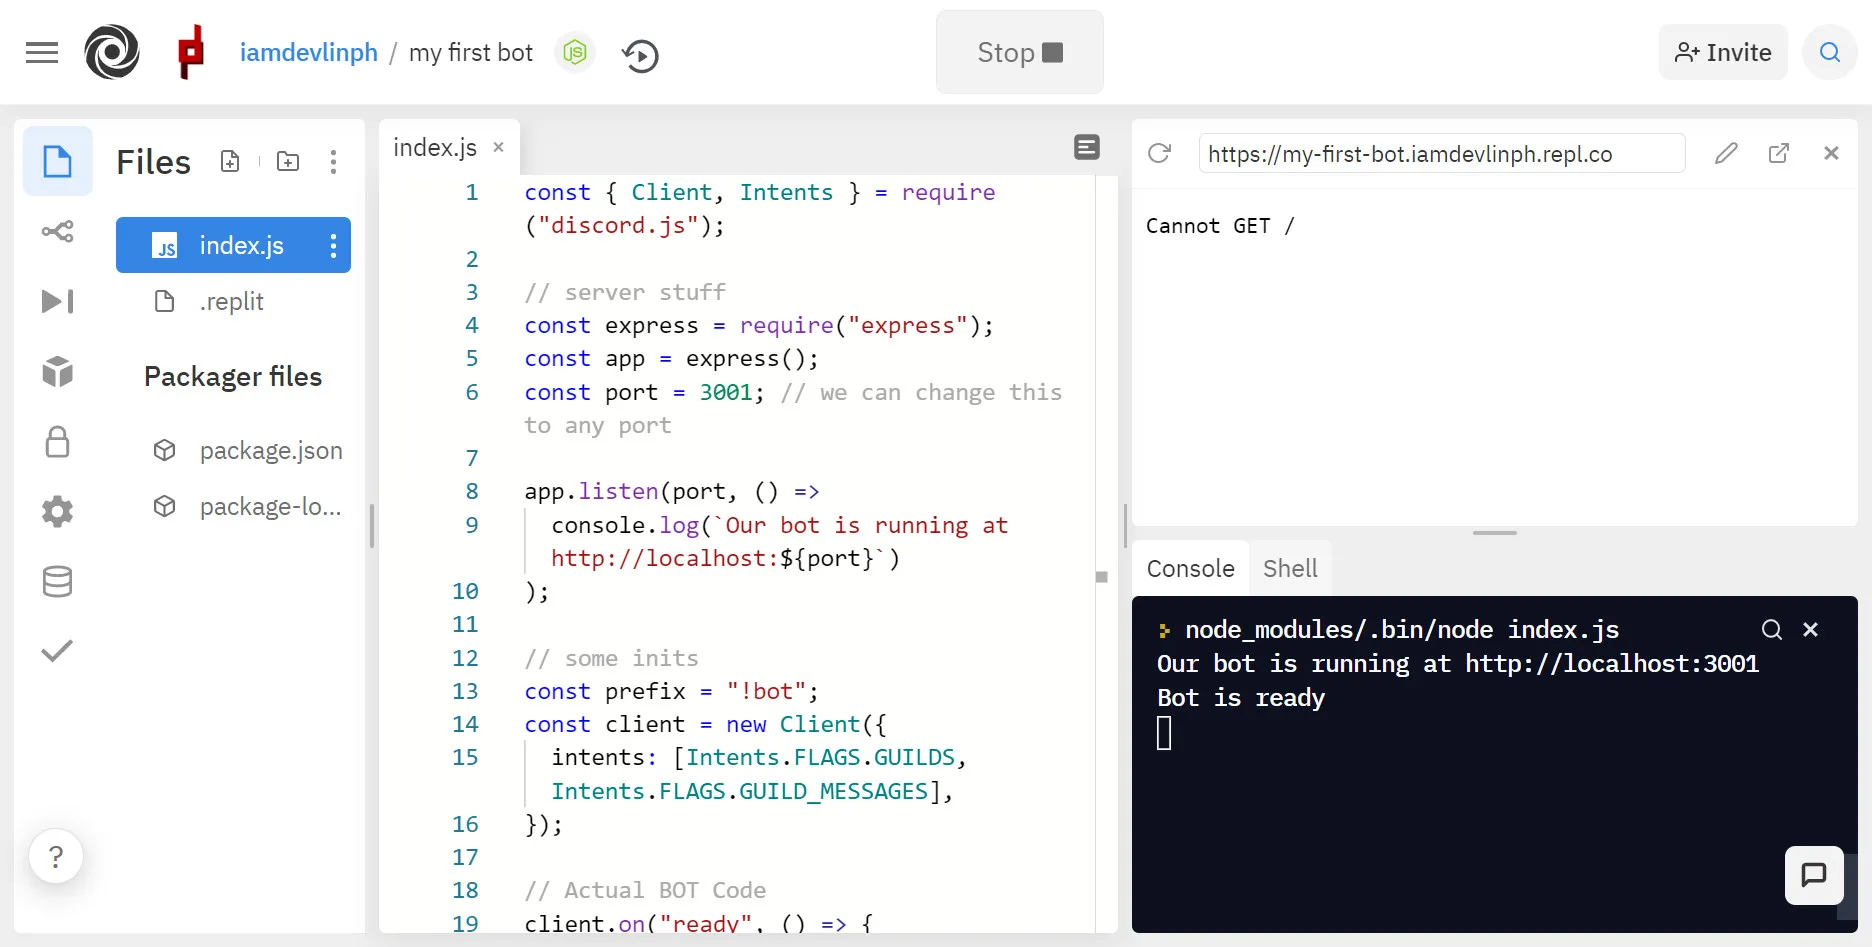
process.env.DISCORD_TOKENYou may notice I have this instead.
The repl is public and the token should be kept private so we’ll move it to the Secrets section instead.
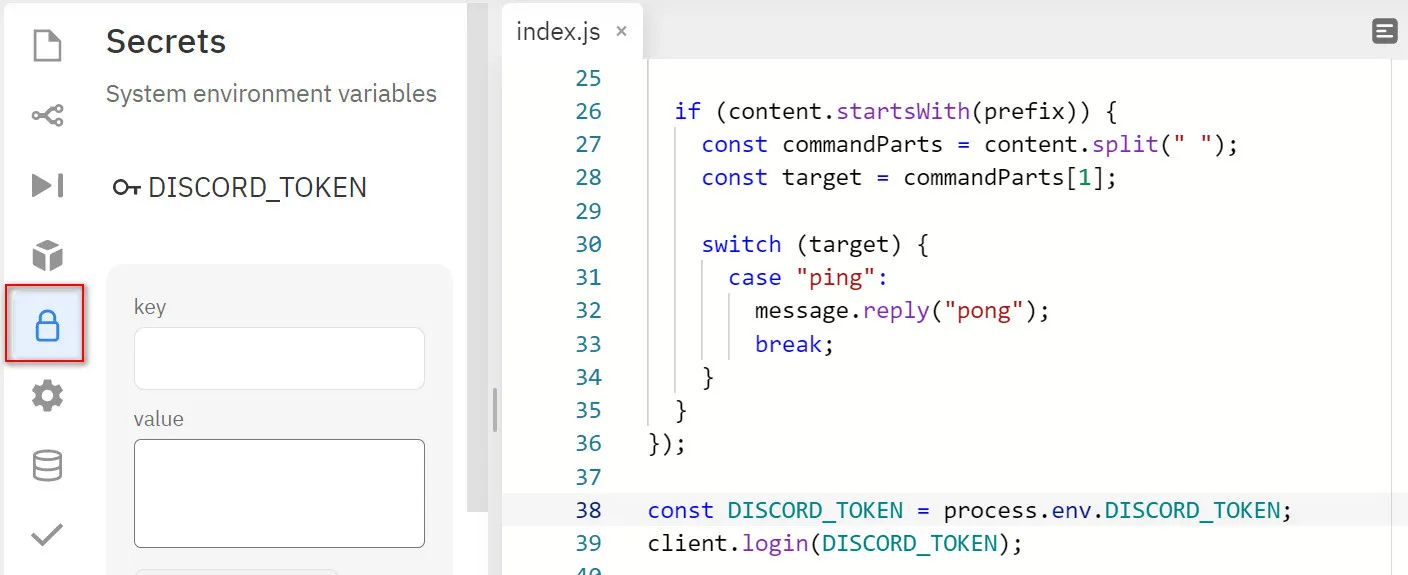
The variables can be access by process.env.VAR_NAME inside the actual code.
Making the bot live forever
Repl server shuts down after an hour or something of idle so we need to always ping it to make it active. We’ll be using uptimerobot ↗️ to make our bot live forever. What this service does is that it pings our server every 15 minutes.
Click on “Add New Monitor”.
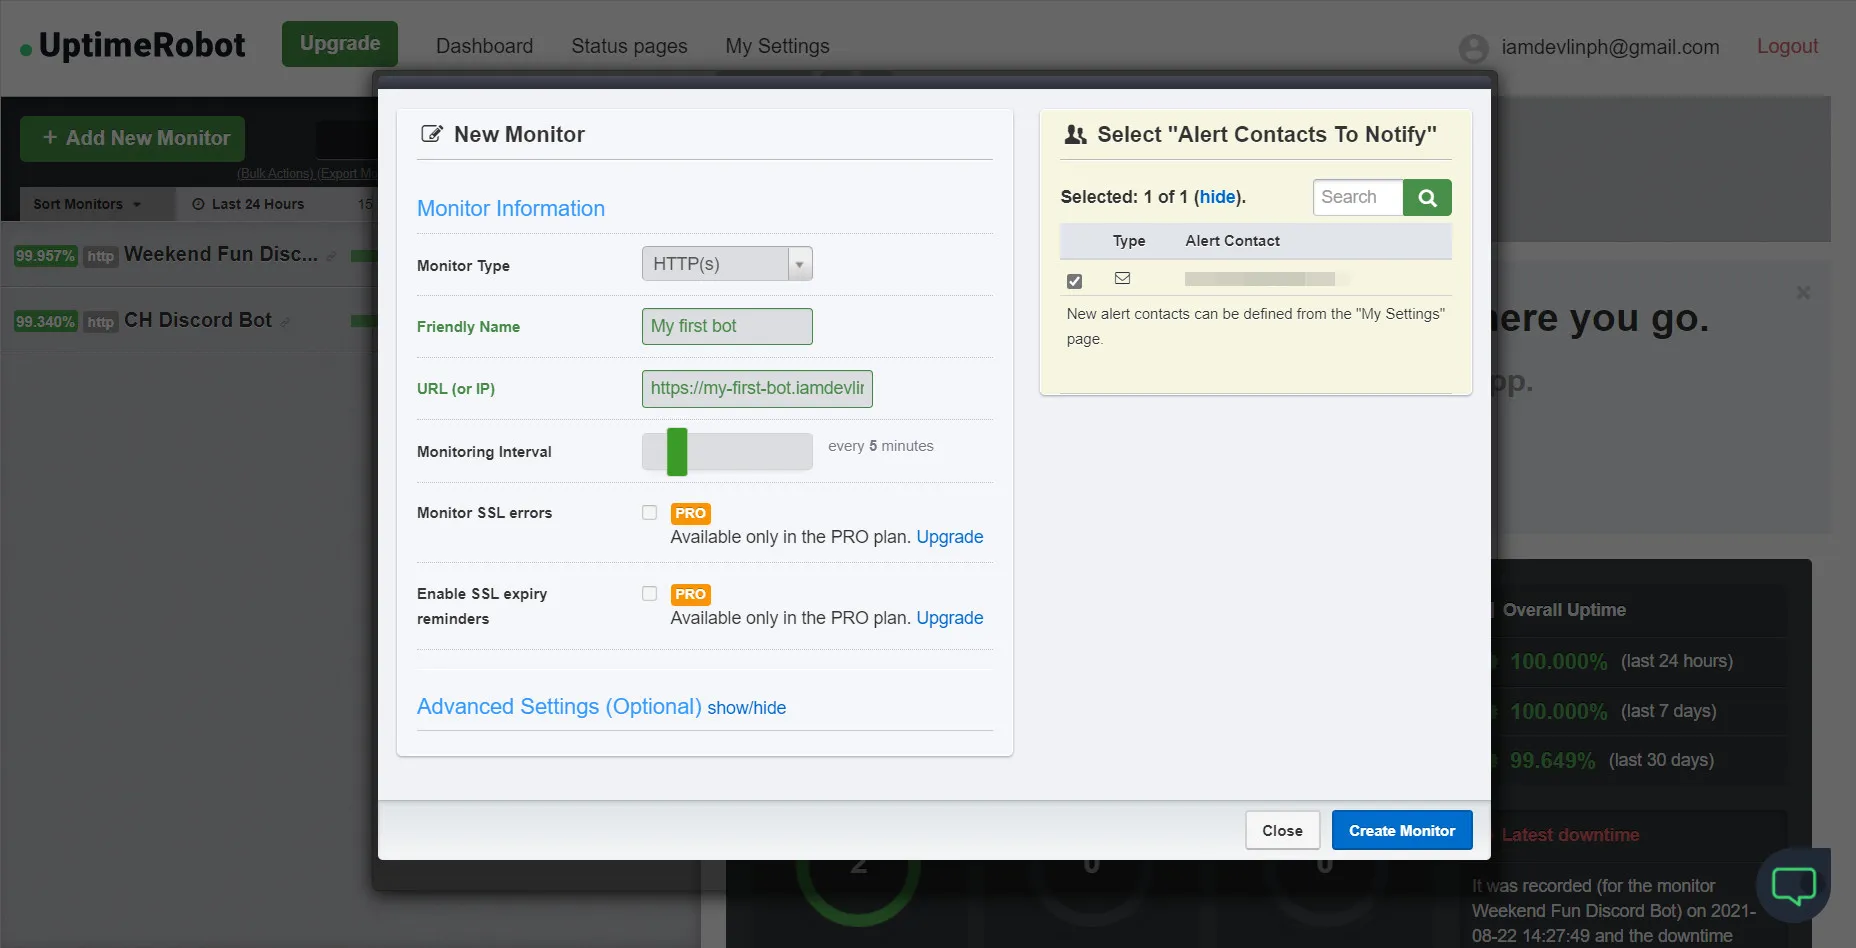
The URL we put here is the url generated when we start our repl. Set interval to 5 minutes and select the email to alert.

And that’s it. You have now a Discord bot that should run forever.
This is just a simple Discord bot but you can do so more like scheduled messages, more styles messages, messages with images, assign roles and many more.
Links: